MDT Database – Named Instance Issue
So the same security conscious client that I last blogged about arranged for their DBA to install SQL Express on the MDT server, create the MDT database and configure permissions (because I’m not trusted enough to install SQL). All seemed well and good – as I got the MDT web front-end deployed and could update the database.
Then I go to test deploying an image after configuring database rules (which basically just updates the customsettings.ini with the SQL connection info) and sure enough “SQL Server does not exist or access is denied” error messages are being displayed.

At first I though that the DBA must not have granted my deployment account db_datareader permissions, but after testing connectivity by creating an ODBC connection I confirmed that permissions were fine.
After searching the internet, I came across a few forum posts that mentioned similar issues all related to using a custom Named Instance. Turns out if you’re using a named instance in SQL Express, you MUST have the SQL browser service enabled. I have tested MDT with the browser service disabled (as per the DBA’s request) but of course my tests were with the default \SQLExpress instance. After all that troubleshooting, the DBA will be reinstalling SQLExpress and reconfiguring the database since she will not enable SQL Browser service on a server that has Named Pipes enabled.
Hope that helps!
Setting up the MDT Web Front End
At long last I managed to convince a customer to start using the MDT Database so that we could have more control over the deployment process and build in better automation. While I’d love to get into that topic at some point, for now just read the article over at Xtreme Deployment: http://deployment.xtremeconsulting.com/2009/11/24/understanding-the-mdt-configuration-database-part-1/
My customer is always worried about security and access to the MDT database (even though it happens to be deployed on the same server), I showed them the MDT web front end that I was running in my lab and they agreed it’d provide a better (and more secure) way to access and manipulate the MDT database. This is what helped get creating the MDT Database approved, since I showed the ability to manage and delegate access of specific and granular levels of control over MDT.
Since I couldn’t find any good deployment articles out there other than the install documentation on codeplex (found here), I figured this’d be a good first technical blog post.
Without further ado, here are the steps to deploy it:
Software Installation
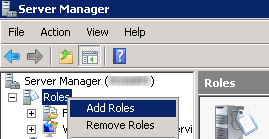
Install IIS Roles
|
Instructions |
Details / Screenshots |
“Server Manager”
|
 |
“Before You Begin”
|
 |
“User Account Control”
|
 |
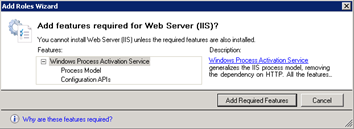
“Add features required for Web Server (IIS)?”
|
 |
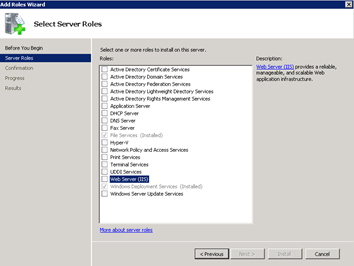
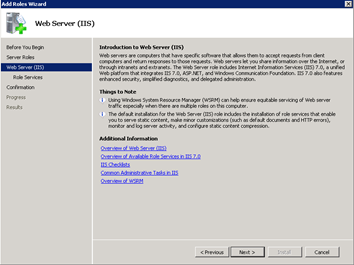
“Web Server (IIS)”
|
 |
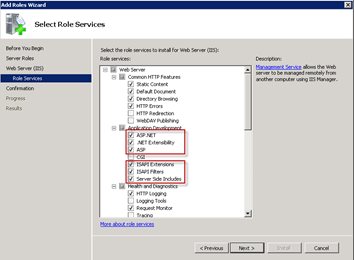
“Select Role Services”
“ASP.NET”, “.NET Extensibility”, “ASP”, “ISAPI Extensions”, “ISAPI Filters”, and “Server Side Includes”.
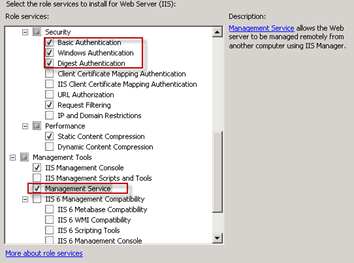
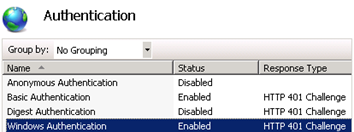
“Basic Authentication”, “Windows Authentication”, and “Digest Authentication”.
|
  |
“Confirm Installation Selections”
|
 |
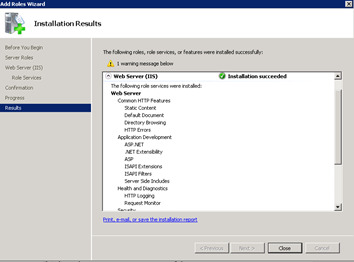
“Installation Results”
|
 |
Extract MDT Web FrontEnd Source
|
Instructions |
Details / Screenshots |
| Download software from http://mdtwebfrontend.codeplex.com/releases/view/35756 and extract to C:\Support\Downloads. | |
“Windows Explorer”
|
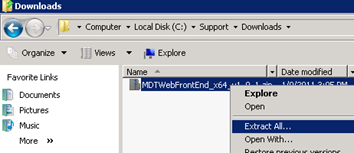 |
“Extract Compressed (Zipped) Folders”
|
 |
Add IIS 7 Web Application for the FrontEnd
|
Instructions |
Details / Screenshots |
“Server Manager”
|
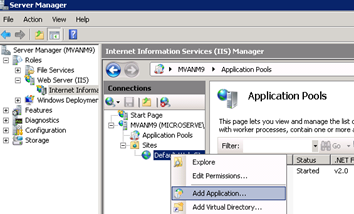 |
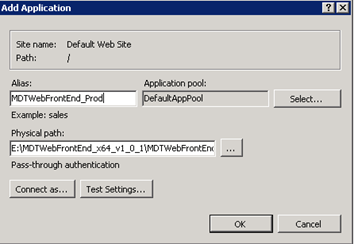
“Add Application”
NOTE: Repeat this process for each environment that needs to be managed by the MDT Web FrontEnd. |
 |
Configure IIS Authentication
|
Instructions |
Details / Screenshots |
“Default Web Site à [WebApp]”
|
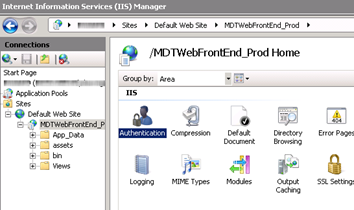 |
“Authentication”
|
 |
Create “MDTWebFrontEnd” Application Pool
| Instructions | Details / Screenshots |
“Application Pools”
|
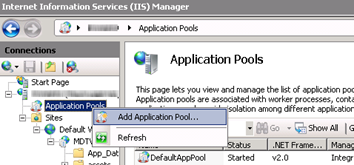 |
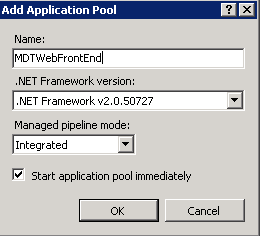
“Add Application Pool”
|
 |
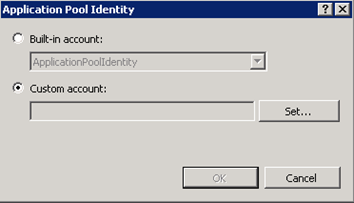
Configure Application Pool Identity
| Instructions | Details / Screenshots |
“NNNNNNNN”
|
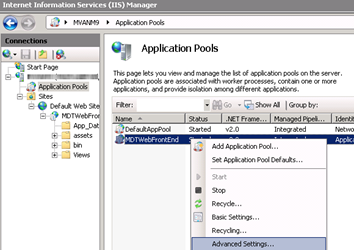 |
“Advanced Setting”
|
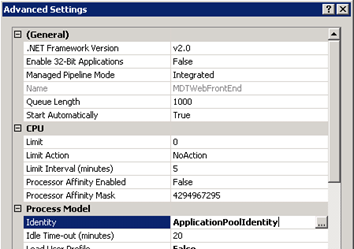 |
“Application Pool Identity”
|
 |
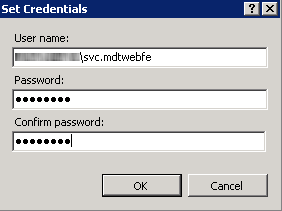
“Set Credentials”
|
 |
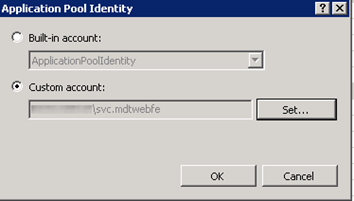
“Application Pool Identity”
|
 |
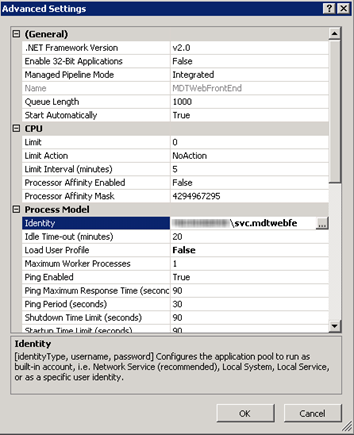
“Advanced Settings”
|
  |
Configure Web Application to use custom Application Pool
| Instructions | Details / Screenshots |
“IIS Manager”
|
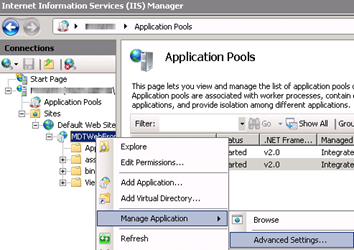 |
“Advanced Settings”
|
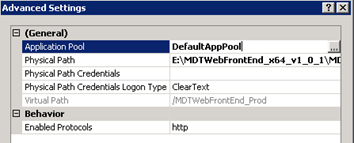 |
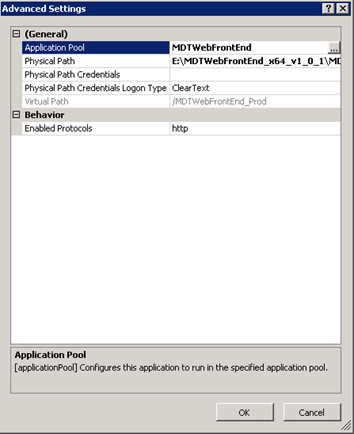
“Select Application Pool”
|
 |
“Advanced Settings”
|
 |
MDT Web FrontEnd Configuration
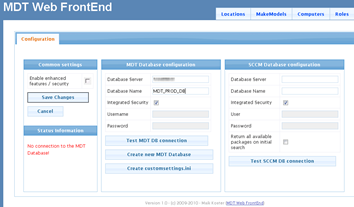
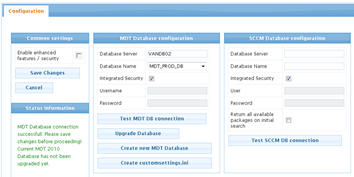
Configure Database Connections
| Instructions | Details / Screenshots |
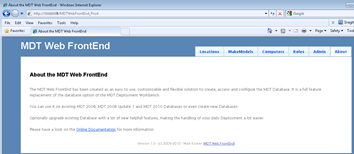
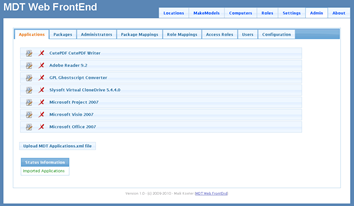
“Internet Explorer”
|
 |
“Configuration”
Confirm the connection is successful. |
 |
“Configuration”
|
 |
“Configuration”
|
 |
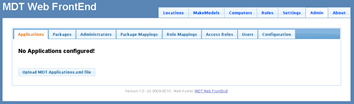
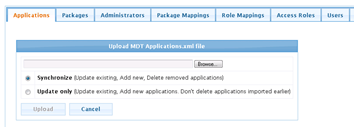
Upload MDT Applications
| Instructions | Details / Screenshots |
“NNNNNNNN”
|
 |
“NNNNNNNN”
|
 |
“NNNNNNNN”
|
 |
“NNNNNNNN”
|
 |
“NNNNNNNN”
|
 |
“NNNNNNNN”
|
 |
“NNNNNNNN”
|
|
Enterprise Vault 9 Administration Console takes a long time to open
Last week I got to do my first production deployment of Symantec Enterprise Vault 9.0 for a small client in Vancouver. While all around, I like the improvements from past versions (I come from the EV 6 days – so trust me, there’s a LOT of improvements to the product than there ever used to be!).
One of my only complaints so far is the load time when opening the Administration Console. It usually takes at least a few minutes to open – and often results in the “this snap-in is not responding” message. You just hit cancel and eventually the console opens – but it’s a pain waiting for it.
So thanks to @errmm, he told me that if I disable “Check for publisher’s certificate revocation” it’ll speed up. So sure enough, I tested it and now it opens in less that a minute!

I step into the world of Blogging
After creating a WordPress account last March, I’ve finally decided to actually write some content for the Blog.
Regardless, I’m on twitter now (@HardCoreITGuy) and I think my status updates regarding my projects don’t mean much unless I blog about them too. I mean, saying yeah I completed a vSphere and SAN deployment doesn’t mean much unless I can write about the highlights and the dos/don’ts that I ran into etc.
I honestly don’t want to blog for publicity or some kind of status in the community, but even though I still feel that I have a vast amount to learn I also feel I have a lot that I could be sharing. I literally have hundreds of ‘how tos’, quick tips, useful links, and best practices that I have sitting in an MS OneNote notebook that I’m continually dumping content into when researching for a project as well as anything I discover during my projects.
So my goal over the next few months is to get active on my blog and start sharing what knowledge I can with the community. I’ve definitely got a bit of a learning curve in terms of how best to share content, upload screenshots, offline editors etc, and not a lot of time to make the blog site ‘pretty’ or cool – so for now, my focus is on content. And then, once my projects are under control and I can free up more cycles I’ll see what I can do about how the site looks.
Skipping F12 when PXE booting from a WDS server
These days, I’ve been deploying my Windows OS’s with Microsoft Deployment Toolkit 2010 in the lab.


